So I have finally pressed my split board.
I don’t have that many pictures of the build process as I was a little busy.
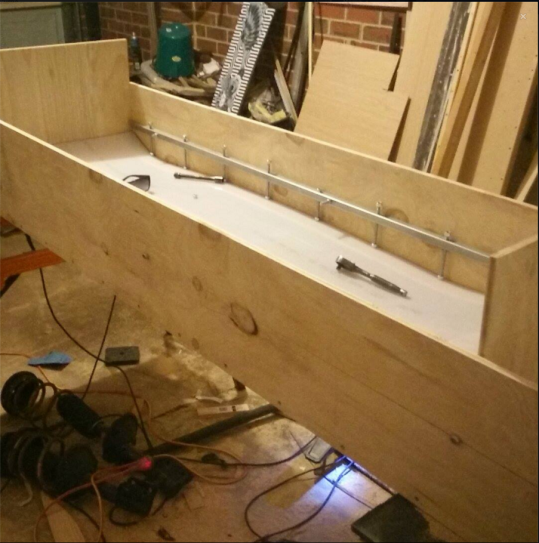
I made a new adjustable mold setup kinda like boardcrafter.com I have 6 ribs in it and a layer of board and another of 3 mm polycarbonate. I did a bunch of tests and is SEEMS to be flat. Flat enough for this snowboard HACK that is.
I had some major drama’s with cores… I thought it would be cool to have the cores cnc’d for shape and thickness. The guy who did it said he was worried that once he cuts them out, he will have no place for retention. I suggested that he profile THEN cut out. He said it was a good idea and he would do it that way. When I collected them they were completely stuffed.. Holes all the way through, thickness variations of over 2mm… It seems that he decided to cut them out first and then HOLD THEM DONE WITH HIS HANDS. I left in disgust and used my router jig to get the job done on the new cores I made. What a complete waste of time and money. The cores I made were made from bamboo. I did something a little weird and I hope it doesn’t come back to bite me. I use 5mm thick bamboo sheet. My cores are 7mm at their thickest so I laminated them together… I have read numerous times people saying this isn’t a good idea. I tested it.. Did lots of flexing and playing. It SEEMS good, I guess we will find out though. I did rought them up and compress them within an inch of their lives so hoping it will be ok.
NO CORE PICS!
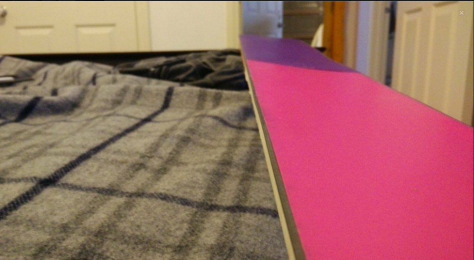
So, I have some pics of the base below. As you can see, the base shape is kinda different. I saw these cool french split boards on the internet and thought I might try to emulate that. They are set back and have ski-ish tips and tails on each of the split piece. I hope it works! Here’s to being different for difference sake hey! Edges are bent and attached. I did full wrap nose but no wrap tails… I would like to say that this was a carefully thought about feature I wanted a lighter tail and a stronger nose. In truth, I snapped one of the 4 edges I had (my only 4) whilst bending it and wasn’t going to order a whole new set from the opposite side of the world. I shortened and glued t-nuts on for guides. 4 of the 6 came off in the mount up. Ohh well.
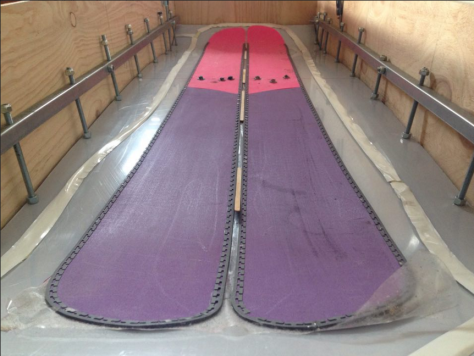
I cleaned these before building the board. They look dirty.
As per usual, not nearly enough pictures of the vac process were taken. the are all below.
My layers are
Base
VDS
Fibreglass
Core
Fibreglass
Carbon
Veneer top sheet.
It was pretty chilly (for Melbourne, Australia on the day I was making this so I came up with a good idea. I borrowed one of those gas turbine heaters and located it in front of my mold. I then used a board I had to make a lid. I had it so It was maybe 40 degree’s in the mold (coffin) and left it like that for the whole time it was pressing. I was working night shift that evening so I had it under vacuum for just under 8 hours.


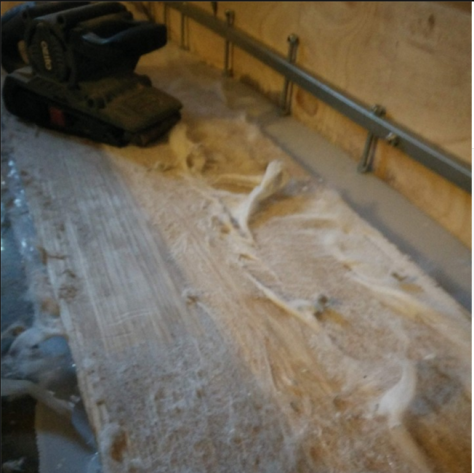
I have taken the board out of the bag and had a look. Base looks good. The gap between the boards looks uniform from what I can tell. I have to wait till I cut it in half though. The proof of the boarding is in the cutting or something. I did make a bit of a blunder… I used a layer of vacuum bag flocking to give me a good vacuum for the full length of the board. Last board I made had a protective coat on the top sheet. This veneer did not. Some how, I forgot to put anything between the flocking and the top sheet. What does this mean? My board is flocked! Its kinda furry all over. I have briefly played with it and the belt sander will take it off I think, no biggie.
THINGS LEFT
Cut out
Drill retention holes
Mount split gear (using Voile).
Tune and base grind
skim coat or polyurethane the top sheet.
Linseed oil bamboo side walls.


